Introduction: The Benefits of Raised Garden Beds
Raised garden beds have gained significant popularity among both novice and experienced gardeners in recent years. These elevated structures serve as an ideal solution for individuals looking to cultivate their own plants while enhancing the overall gardening experience. One of the primary advantages of raised garden beds is their ability to improve soil quality. By raising the soil above ground level, gardeners can create a controlled environment that allows for optimized soil composition, resulting in healthier plants.
Moreover, raised garden beds provide excellent drainage. The elevation prevents water pooling, which is particularly beneficial in regions that experience heavy rain. Good drainage not only protects plant roots from rot but also fosters a thriving ecosystem for beneficial organisms like earthworms. This feature makes raised beds a smart choice for anyone aiming to achieve optimal growing conditions while minimizing the risk of water-related issues.
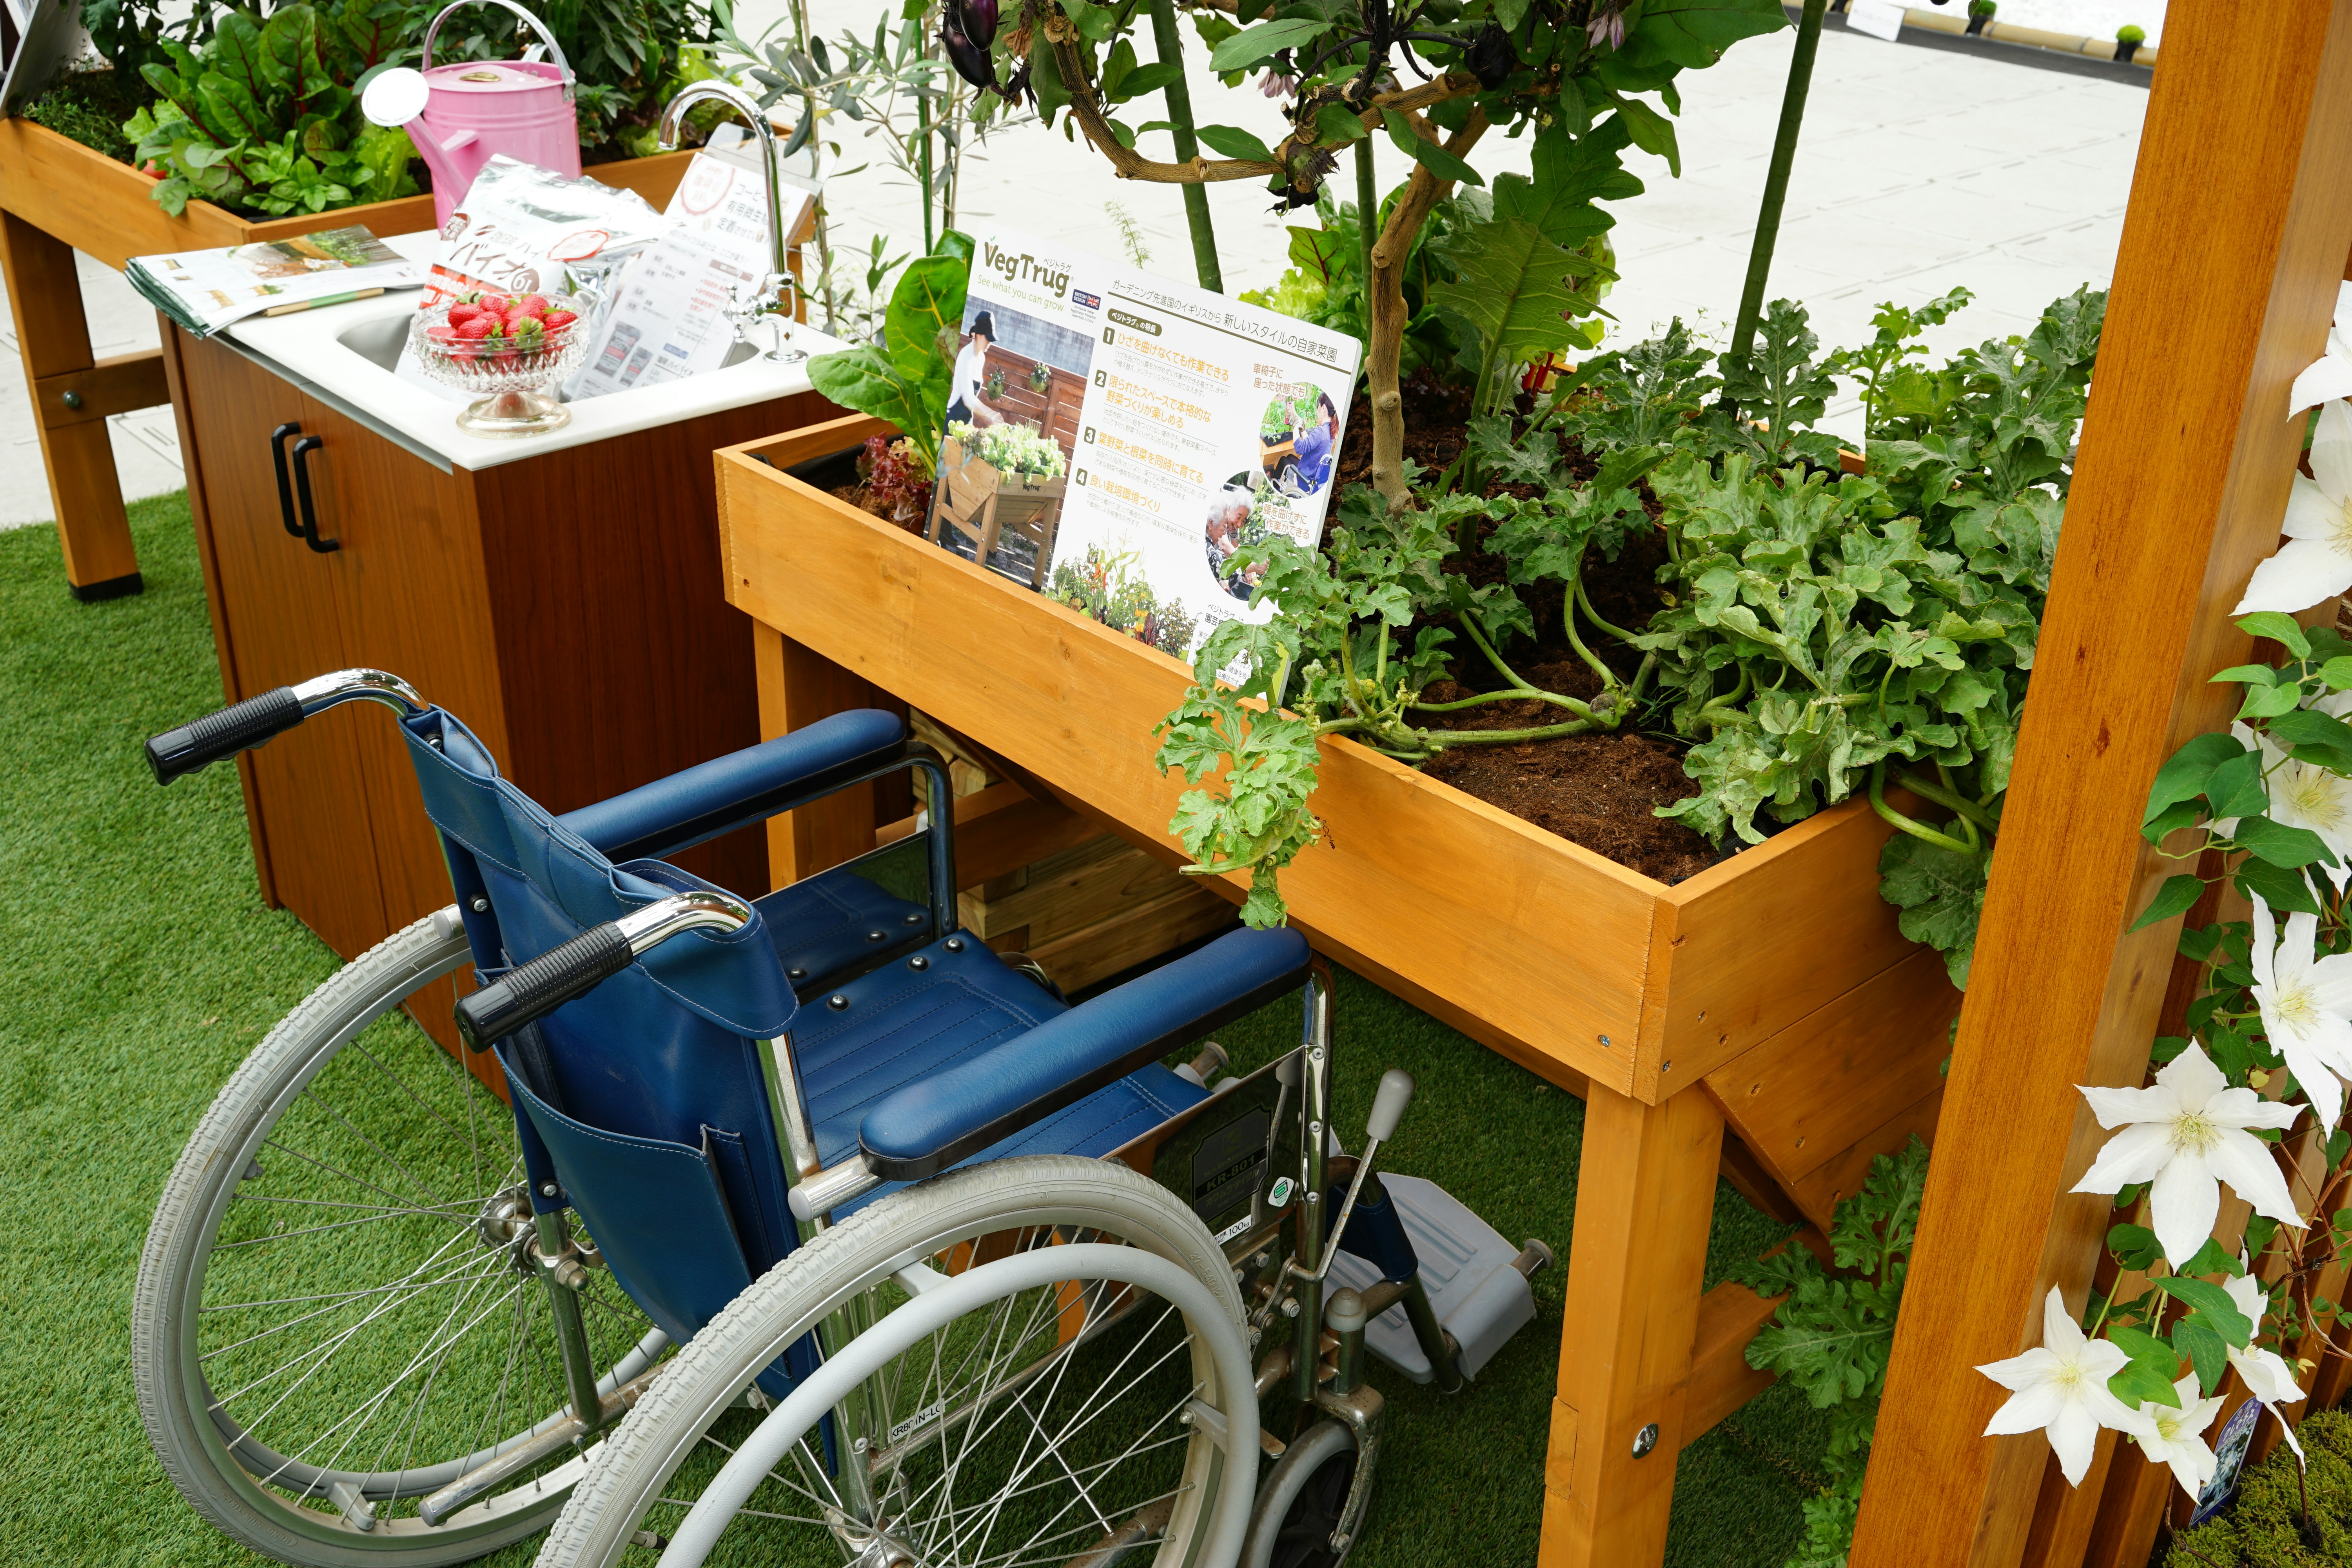
Another noteworthy benefit is the significant reduction in weeds. With raised garden beds, the likelihood of weed invasion is minimized since the contained soil structure discourages weed growth from surrounding areas. This can save gardeners time and effort as less weeding means more time invested in nurturing plants. Additionally, raised garden beds enhance accessibility for gardeners. The elevated design allows for comfortable planting, tending, and harvesting without the need for excessive bending or kneeling, which can be particularly advantageous for individuals with mobility challenges.
Importantly, constructing a raised garden bed is an achievable project even for those with no prior experience. These beds can be built using various materials such as wood, stone, or even bricks, and the process can be simplified through readily available online resources and guides. Thus, anyone can embark on this rewarding gardening adventure, cultivating their plants while reaping the manifold benefits that raised garden beds have to offer.
Material List: What You Need to Get Started
Building a raised garden bed requires careful selection of materials to ensure durability and functionality. For the construction of the frame, using rot-resistant wood is essential. Suitable options include cedar, redwood, or pressure-treated lumber specifically designated for outdoor use. These types of wood are adept at withstanding moisture and pests, ultimately prolonging the lifespan of your raised garden bed.
When assembling the frame, you will need corrosion-resistant screws, as standard screws may degrade over time due to exposure to the elements. A variety of lengths are available, typically ranging from 2.5 inches to 4 inches, depending on the thickness of the wood you choose. In addition to screws, you may find it beneficial to have corner brackets to enhance the structural integrity of the bed.
Optional materials include landscaping fabric or plastic liners. Landscaping fabric serves as a barrier against weeds while allowing drainage, promoting a healthier environment for your plants. If you are concerned about soil leaching or have specific plants that require different soil conditions, a plastic liner can be installed inside the frame to separate the soil from the wood. This also protects the wood from moisture and increases its lifespan.
In terms of tools, basic items such as a drill, saw (hand or power), measuring tape, level, and safety goggles will facilitate a smoother construction process. A square tool will also assist in ensuring that the corners are perfectly aligned for a stable raised garden bed. Having these materials and tools prepared beforehand will streamline your project, allowing you to focus on creating an enjoyable and productive garden space.
Choosing the Perfect Location for Your Raised Garden Bed
When embarking on the journey of constructing a raised garden bed, selecting the ideal location is a critical first step. The placement of your garden bed affects not only the growth of your plants but also the ease of maintenance and accessibility. To ensure a thriving raised garden bed, several factors must be evaluated: sunlight exposure, drainage characteristics, and available space.
Sunlight is perhaps the most crucial element for the health of your plants. Most vegetables and flowers thrive in full sun, requiring a minimum of six to eight hours of direct sunlight per day. Monitor potential spots throughout the day to observe how sunlight moves across your yard. Areas shaded by trees, buildings, or fences may reduce the amount of sunlight your plants receive, hampering their growth and yield. Choose a location that maximizes exposure to sunlight, and consider using tools such as sun charts to help in your decision-making process.
Equally important is drainage. Raised garden beds typically provide better drainage than traditional gardens, but the location still plays a vital role. Avoid placing your bed in low spots where water tends to accumulate after heavy rainfall. Instead, opt for a spot with well-draining soil to prevent root rot and other moisture-related issues. If drainage is a concern, incorporating gravel or other materials at the base of the bed can further improve water movement.
Lastly, assess the available space in your yard or garden. Ensure that your chosen location provides ample room for the size of your raised garden bed while allowing sufficient pathways for access and maintenance. This consideration prevents overcrowding and facilitates easy movement, making gardening tasks more manageable. Taking the time to evaluate these factors will help you choose the perfect location for your raised garden bed, ultimately leading to a successful and productive gardening experience.
Building Instructions: Step-by-Step Assembly and Soil Mixing Guide
Constructing a raised garden bed can be a rewarding project for beginners. Start by gathering your materials: choose rot-resistant wood, such as cedar or redwood, to ensure durability. For a typical raised garden bed, the recommended dimensions are 4 feet wide by 8 feet long and 12 inches high. This size allows for ample growing space while maintaining reachability from either side. Using a saw, carefully cut four pieces for the sides: two measuring 4 feet and two measuring 8 feet. Reinforce the corners with sturdy brackets or screws, securing them tightly to form a rectangular frame.
Next, it’s essential to prepare the location where your raised bed will be placed. Select a spot that receives ample sunlight for most of the day and has good drainage. Once you’ve chosen a suitable site, clear any grass or debris to ensure a stable base for your structure. To enhance drainage and weed control, consider lining the bottom with landscaping fabric or cardboard before placing the frame on top.
After assembling the frame, the next step is to create the ideal soil mix for your raised garden bed. A balanced mix of components will ensure your plants receive the nutrients they need. The ideal soil mixture should consist of one-third compost, one-third topsoil, and one-third peat moss or coconut coir. This combination promotes good drainage while retaining moisture and providing essential nutrients. Mix these components thoroughly in a wheelbarrow or on a tarp before filling your raised bed with the mixture.
Once your raised garden bed is filled with the nutrient-rich soil, it’s time to consider what to plant first. For beginners, easy-to-grow vegetables such as lettuce, radishes, and tomatoes can provide a fulfilling start. These plants tend to establish quickly, allowing you to gain confidence as you embark on your gardening journey.


